Showing posts with label guest posts. Show all posts

Friday, October 12, 2012

Guest Post: Adrian Loves Owls

Hi, I'm Adrian and I blog at Adrian Loves Owls. I enjoy blogging about personal style, photography and adventures. I'm so excited to be guest blogging for Aarika today. I love her vintage style and she has big glasses, like me! Today, I'm sharing an outfit I wore a couple of weeks ago. 
Outfit Details:
Cardigan: H&M
Blouse: thrifted
Skirt: thrifted
Belt: thrifted
Shoes: vintage
Socks: Sock Dreams


I accidentally went to the mall last weekend and I quickly realized why I love thrifting so much. Not only are the prices unbeatable, the thrill of hunting for something unique makes it that much more fun.
Thank you so much for having me on your blog today, Aarika! 
____________________________________________________
Thank you for stopping by Adrian! I just love everything you wear, you have a real knack for putting together a fantastic outfit. To see more of Adrian's super cute fashion-y goodness, mosey on over to Adrian Loves Owls

Sunday, October 7, 2012

Guest Post: lala faux bois

Hello, Darth Pickles readers! I'm so excited to be guest posting here today, I've quickly become a fan of Aarika and her blog! My name is Lisa and I blog over at lala faux bois. I'm obsessed with traveling, vintage, and making stuff and love to blog about my adventures in thrifting. Today I want to share an entirely thrifted outfit with you. lala faux bois vinage outfit 
 skirt, shoes, scarf: thrifted vintage // top: thrifted // necklace: homemade 
 I am four months in to a five month 2nd-hand challenge I've set for myself, to break up with chain clothing stores. Even though vintage is my favorite I found myself supplementing my closet with cheap, fast fashion and feeling guilty about not wanting to wear it more than once or twice. I would love it if you want to join in for my last month- or what I actually hope becomes a lifestyle change! lala faux bois guest post 
 I have been blogging a little over a year and my favorite part is the friendships I've made- even though I haven't met a blogger in person yet! I love our community and getting to know people through this outlet. It's such a fun way to share interests and archive little moments in our lives. lala faux bois guest post 
 I really enjoy finding new blogs would love it if you would like to stop by and say hello sometime :) Thank you so much, Aarika for having me!!
____________________________________________________________
Thanks Lisa! Your outfits are always too cute! You are one thrifty goddess. :) Readers, make sure to pop by Lisa's blog, lala faux bois, I guarantee you'll be inspired.

Monday, August 27, 2012

Guest Post: The Quiet Owl


Hello! My name is Karen and I blog over at The Quiet Owl. Today, I'm going to show you how to make a Pompom Garland. Pompoms are super easy to make and can be used for a variety of crafts. Here's what you'll need...
  • Yarn- Any kind will do, but I would stay away from cotton and use an acrylic blend.
  • Thin cardboard- from a cereal box or anything of the sort will work fine.
  • Scissors.
  • Tapestry Needle.
1. Cut out a template to make your pompoms. You'll need 2 donut shapes with a chunk cut out of them. The bigger you make your donut, the bigger your pompom will be. Mine is about 3 inches in diameter.
2. Put the two pieces together so the chunks you cut out align.
3. Start wrapping your yarn around the template. It doesn't really matter if the yarn is evenly wrapped around the template, just as long as you get it covered. Don't get too close to the edges.
4. The more yarn you wrap around the template, the fuller the pompom will be. I wrapped mine around just twice, but if you want a fuller look, I would wrap around at least 4 times. Cut off the yarn at any point.
5. Now, carefully start cutting around the edge as shown. Make sure you have a good grip on the rest of the yarn so it doesn't fall apart. You make have to chop at it a bit, as it's thick and hard to cut.
6. Cut another piece of yarn, about 5" long. It can be the same color as the yarn you are using, but I would recommend a different color just so that it's easier to see. Slide it between your 2 template pieces. Tie a knot as tight as you can get it, then repeat in the same spot. Double knot the yarn in a few different places so your pompom won't fall apart.
7. Slide your template pieces apart. Snip the loose parts of yarn off from where you tied your knots. Now you can slide the templates all the way off.
8. Now you have a pompom! But, you may have a few pieces of yarn that are longer than others. Just give your pompom a haircut until it's an even ball. Remember, it doesn't have to be perfect!
9. Once it's fairly even all the way around, you're done with the pompom.
10. Thread your yarn on your tapestry needle like you are about to sew something.
11. Carefully stick your needle through the middle of the pompom and pull it through. Repeat for all of your pompoms. You'll want to get plenty of slack of either side of your pompoms to hang them. Space them out however you like (I did about an inch or so between mine).
That's it! Now you can hang your garland wherever you like!!!
__________________________________________________
Thank you so much Karen! I just love this fun little craft and can't wait to make on myself! By the way, funny and random coincidence- I have that same owl on your mantel! :) Dear readers, please be sure to stop by Karen's blog, The Quiet Owl. You won't be disappointed! Happy Monday!

Thursday, August 23, 2012

Guest Post: Just Dawnelle

Hello Darth Pickles readers! How are all of you today?! I'm excited and honored to be here sharing a little project I am super super excited about!
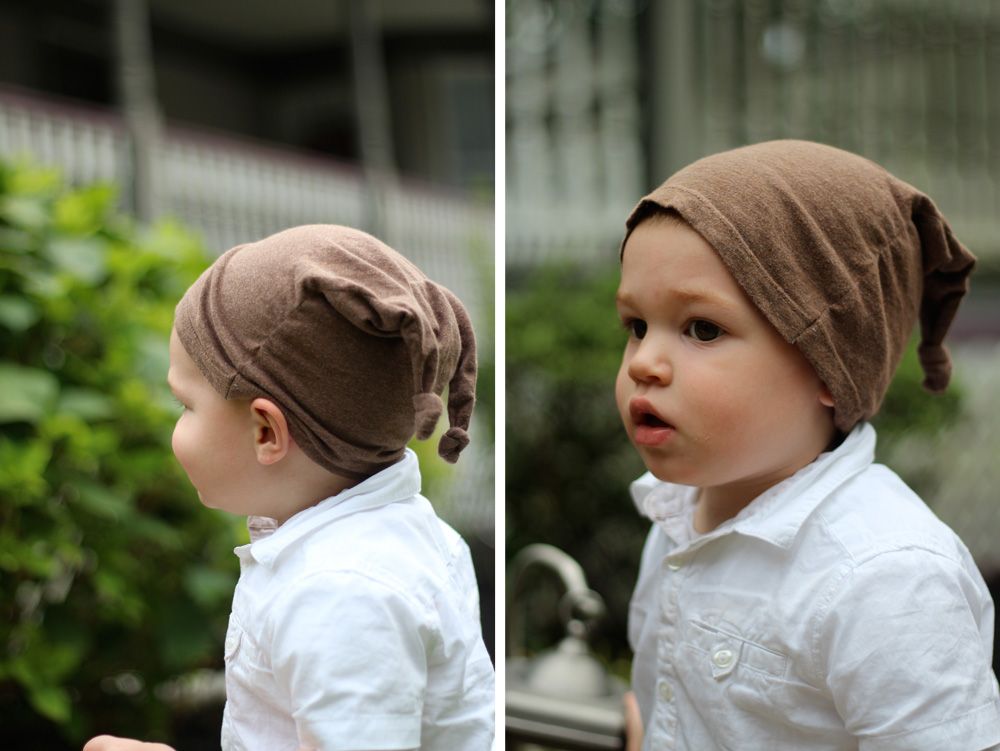
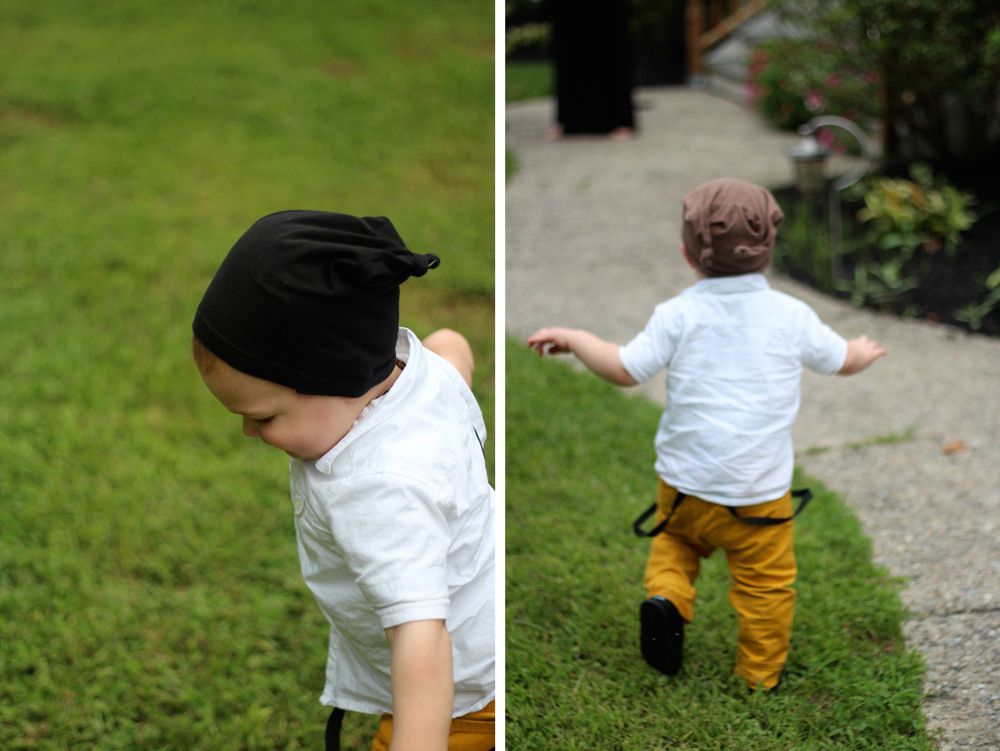
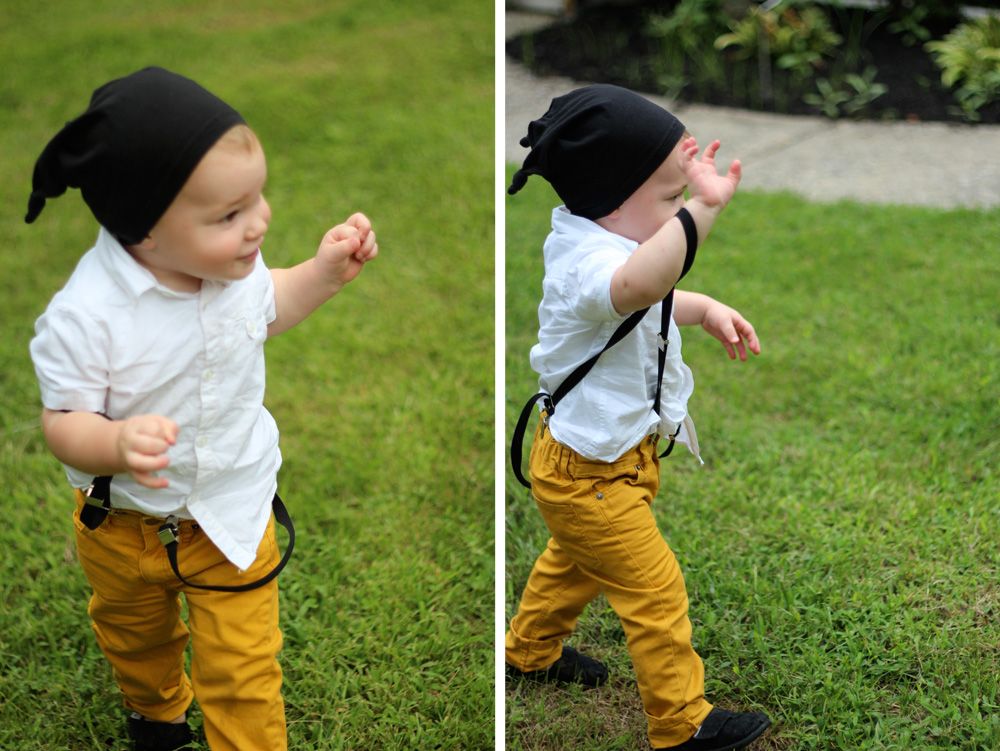
I have a thing for toddlers in little beanies and recently found these fabulous little hats that I have fallen completely in love with. How can you not adore those two little knots?? They look like they could almost be little ears!
So my thought... lets try making one! Ooh, out of a t-shirt! How fun right? You could even use a little bit of the graphic on the t-shirt in the hat right??
And you can't tell me your heart doesn't just melt a little when you see a this...!?
Here's what I did...
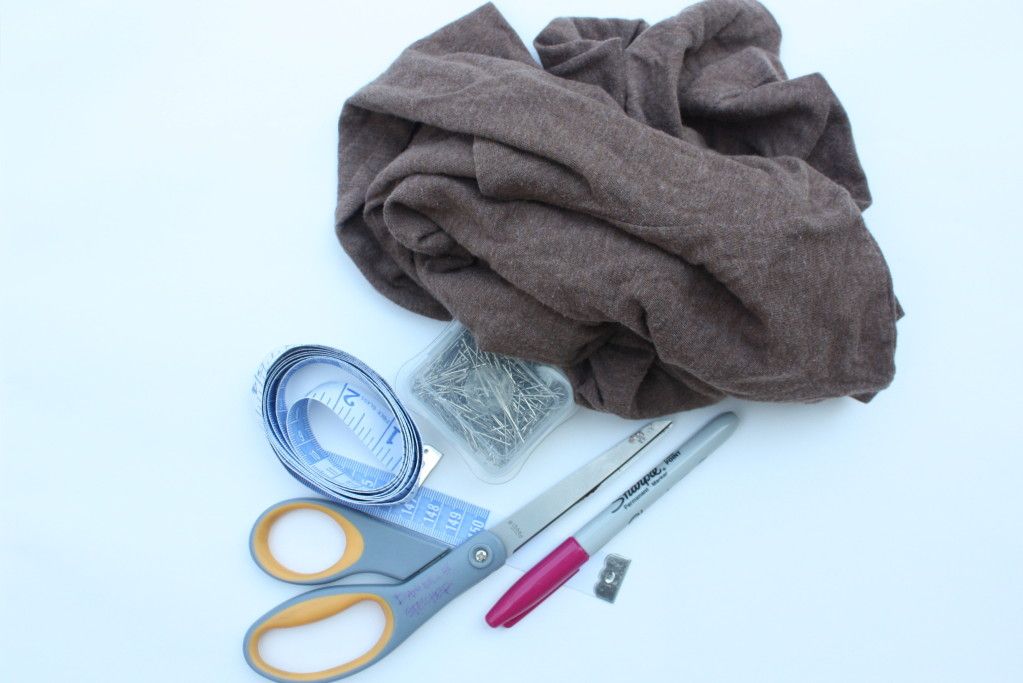
Supplies
Old t-shirt (knit fabric!)
Scissors
Measuring Tape
Marker
Sewing Machine
Instructions
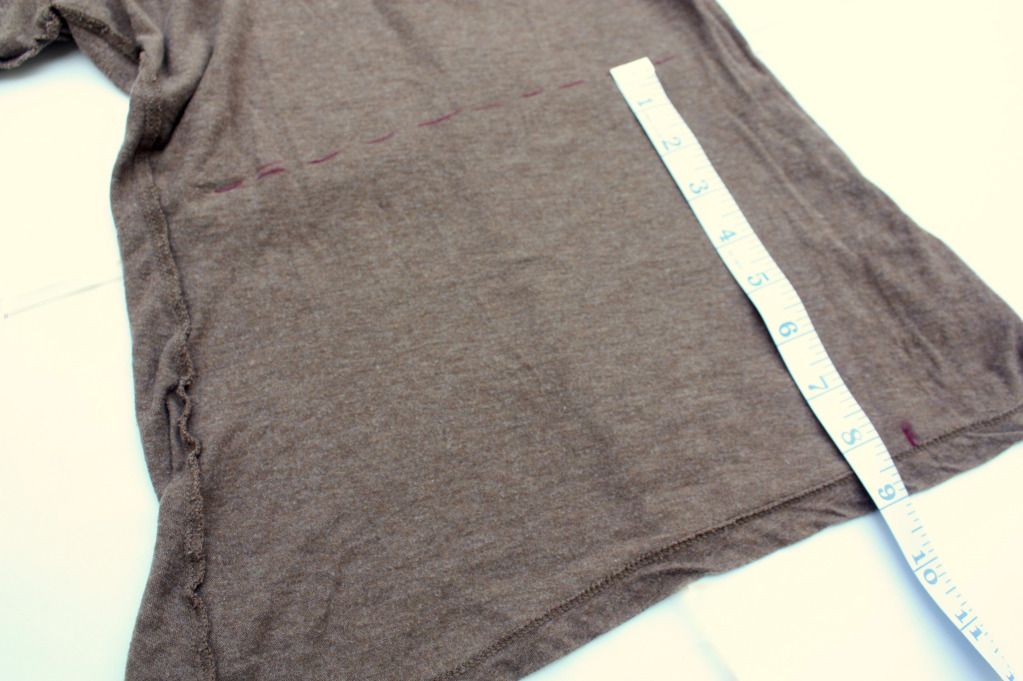
Begin by measuring your little's head. My boy's head was about 20" in circumference.
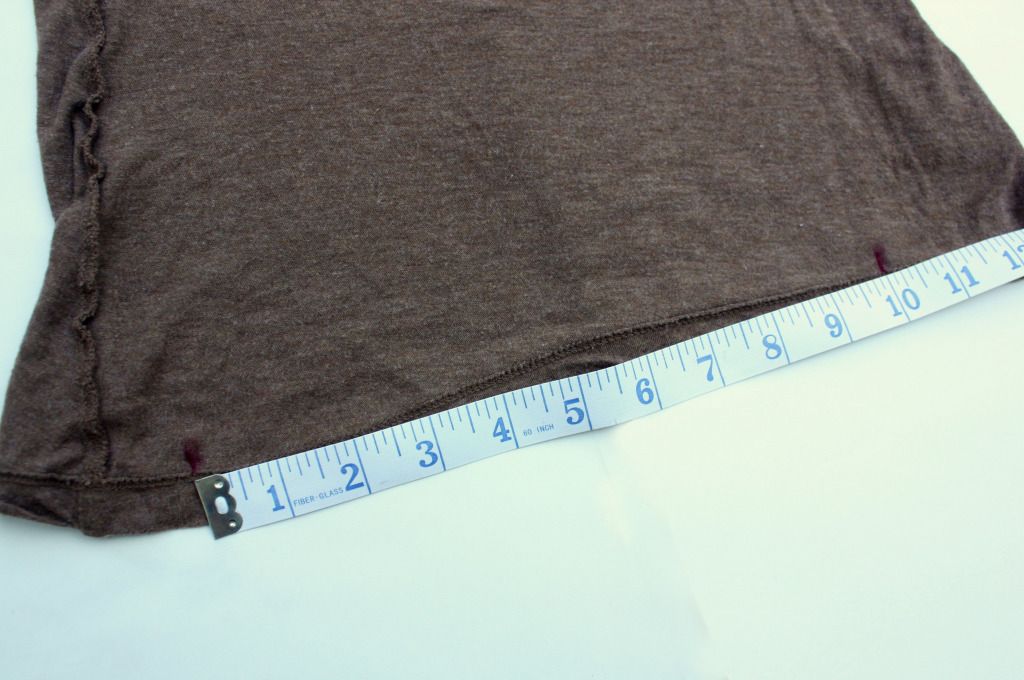
Lay the shirt you are cutting up out flat with the bottom hem all lined up INSIDE OUT!
Using your measuring tape, mark the sides of your hat. You will want to take the total circumference and split it in half to calculate the two sides of your hat.
Measure up about the same as the width of your hat so you have marked out a large square.
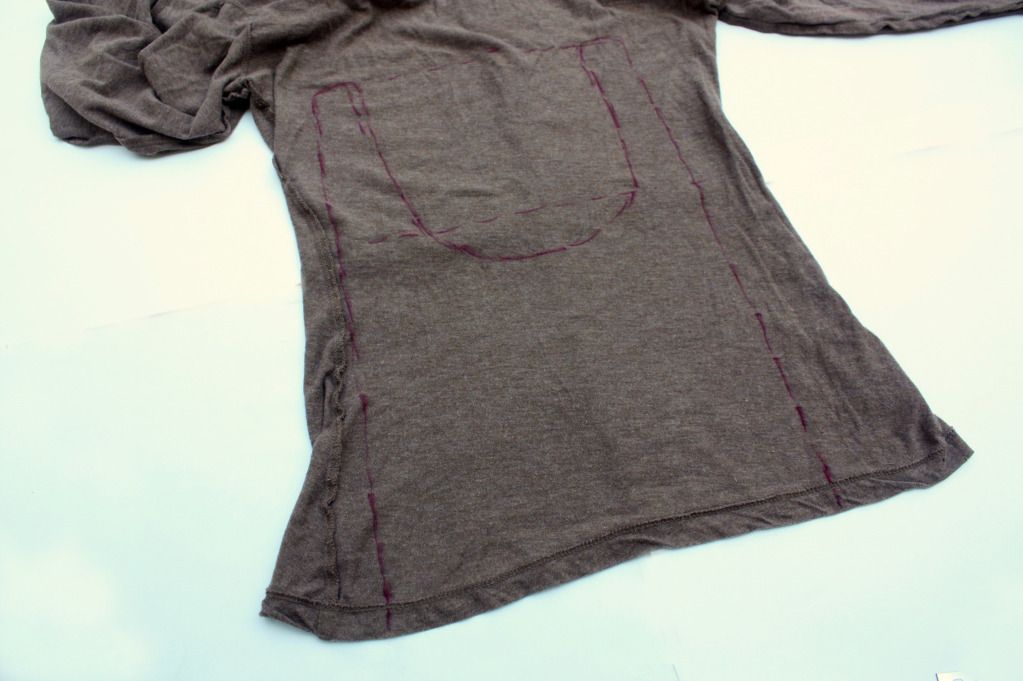
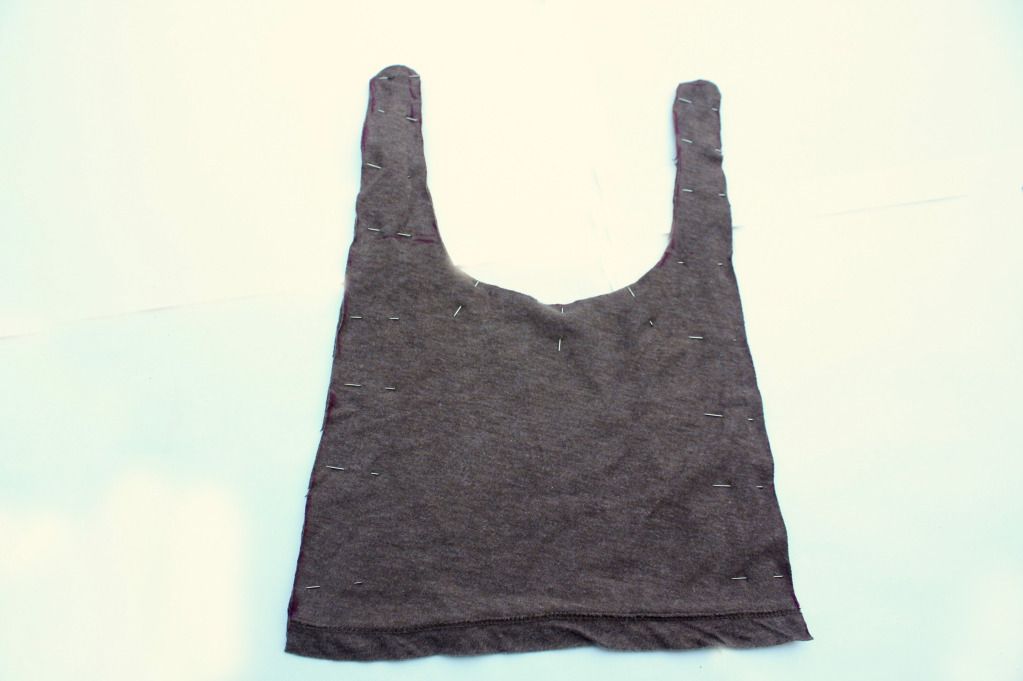
Sketch out your hat so it looks like the image. I know, rather vague, but I promise it is sooo much easier than it sounds. The two little long pieces for the knots are about an inch maybe an inch and a half in width and approximately five inches long. But you can make it any size you want really!
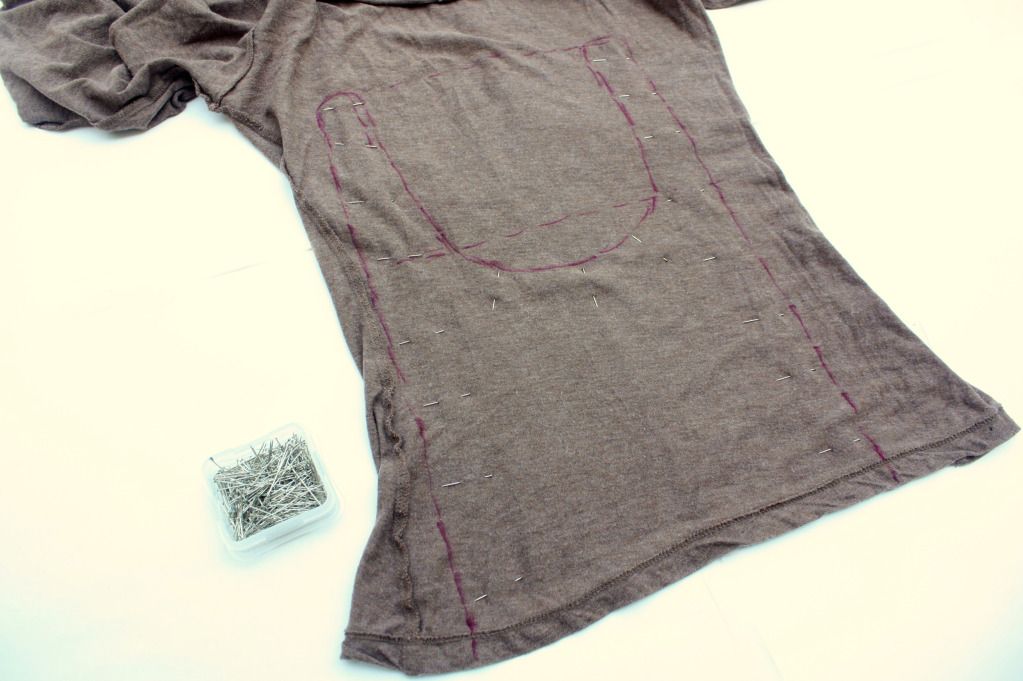
After you have sketched out your hat, pin it all together so when you cut it out the pieces don't separate.
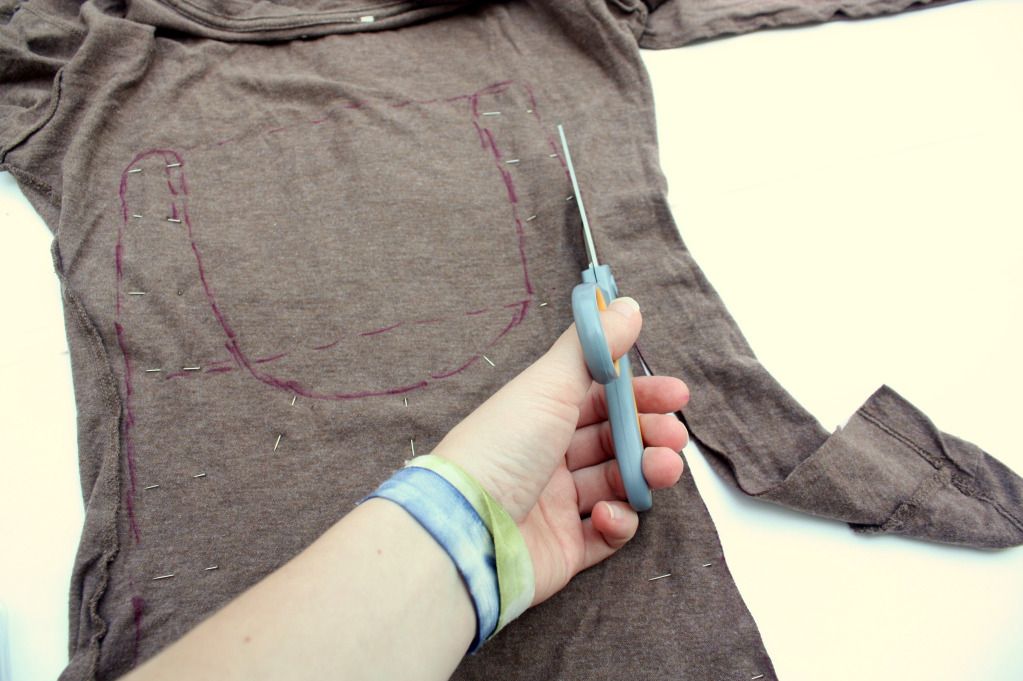
Cut it out! Both sides of the shirt together.

Once it is all cut out, sew it together! How simple right? I sewed mine with a 1/4" seam all the way around, single stitch. I'm really not a seamstress by any means, but this seemed to work just fine!
Flip the hat right side out.
Knot each of your little "ears"
Try your little hat on your little and marvel at your mad skills!
 Would it be totally weird if I made one of these for me?? I totally want one...
Be sure to come and check out all my other super fun projects over on JustDawnelle!! I would love to have you!
_______________________________________________________
Thanks so much Dawnelle, these are too cute! I can't wait to whip some up for my littles. I certainly have an overabundance of old t-shirts I could put to good use!

Monday, August 13, 2012

Guest Post: Shades of Monet Chronicles

Hello there Darth Pickles Readers!

My name is Marisa Noelle and I blog over at The Shades of Monet Chronicles.  How very nice to meet you here today on Aarika's darling blog.  I'm a vintage loving gal who adores making music, exploring new places, baking to my little heart's content and just like Aarika, I am a mommy too.  Though free time is few and far between when you have a spitfire little two year old boy in the house, I love kayaking, soaking up sun on the lake where we live, playing my ukelele and cozying up to a classic Hemingway novel if the moment permits.  Otherwise it's Dr. Seuss and Thomas the Tank Engine all the way - and I simply can't complain :)
Outfit Details: Blouse, Skirt, Shoes: Thrifted // Hat:UO // Brooch: Antique Mall


So now that you know a little about me, I am going to leave you here today with one of my favorite cupcake recipes.  
Toffee Espresso Cupcakes with Bailey's Toffee Icing.  These surely won't disappoint.
Ingredients:
2 TBSP instant espresso granules
1 Cup boiling water
1/2 Cup butter flavored shortening
1-1/4 Cups sugar
2 Eggs
1-3/4 Cups all purpose flour
1/4 Cup baking cocoa
1-1/2 TSP baking powder
1/2 TSP baking soda
1/2 TSP salt
1 Cup chocolate covered English toffee bars, crushed (Skor)

Icing:
1 (8 Ounce) carton whipping cream
1/4 Cup milk
4-1/2 TBSP instant vanilla pudding mix (Jello)
3 TBSP Bailey's Irish Cream
1 chocolate covered English toffee bar, crushed (Skor)

Directions:
-Preheat oven to 350 degrees.
- Dissolve espresso granules in boiling water and cool.
- In a large bowl, cream shortening and sugar until light and fluffy.  Add eggs, one at a time and beat after each addition.  
-Combine flour, cocoa, baking power, baking soda and salt then add to creamed mixture alternatively with espresso mixture and mix well.  Fold in toffee bits.
-Fill paper-lined muffin cups to 3/4 full.  Bake for 20-22 minutes or until a toothpick in the center comes out clean.
Cool for 10 minutes before removing from the pan to wire racks.

(Yields 16 cupcakes)

For the icing:
In a medium mixing bowl, add the whipping cream, milk, pudding mix, and Bailey's Irish Cream.
With an electric mixer, beat at high speed for 4-6 minutes or until soft peaks form
Add in your crushed toffee bar.
Spread onto cooled cupcakes.
Stick in the refrigerator prior to serving.

Now pour yourself a piping hot cup of joe and do enjoy these yummy little morsels!  Thank you Aarika for asking me to post here today and thank you darlings for reading along.

Love bunches, 
Marisa Noelle
_____________________________________________________

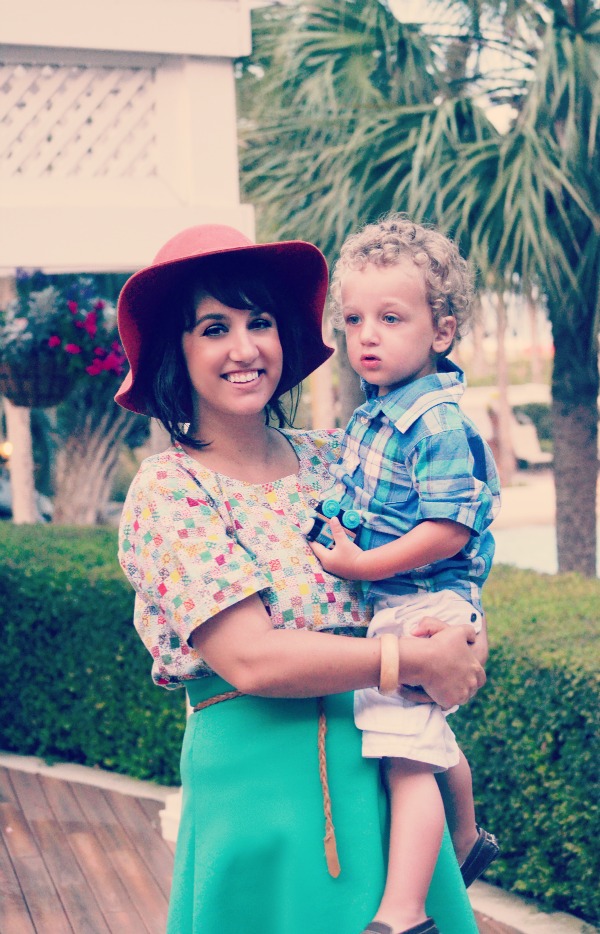
Thank you Marisa! You and your little guy are too cute for words, and I certainly can't wait to try my hand at these cupcakes! Readers, make sure you check out Marisa's blog. Her style is fantastic and she's just as sweet as can be! 

Saturday, August 11, 2012

Guest Post: Little Lady Little City

Hello Darth Pickles readers, I'm Amanda from Little Lady Little City. I am all kinds of honored that Aarika asked me to do a little guest post for her! 
After a little thinking about what I was going to write about I thought I would share one of my favorite cookie recipes, snicker doodles! Besides oatmeal cookies snicker doodles are pretty much the best cookies on earth. Also your love of them pretty much is a requirement for us being friends, well not really but it should be, hehe. 
Ingredients:
2 3/4 cups flour 
1 tsp baking soda
1/2 tsp salt
1/2 cup shortening
1 stick butter softened
1 1/4 cups sugar plus 3 tablespoons for the cinnamon/sugar mixture
2 large eggs
1 Tbs cinnamon 
Preheat oven to 350 degrees F. In a mixer beat together the shortening and butter until well blended. Add 1 1/4 cups of sugar and continue beating until light and fluffy about 5 mins (I usually let it go for about 10 mins to let it get really fluffy). Add the eggs one at at time, beating well between. 
In a separate bowl combine dry ingredients together. Once wet mixture is nice and fluffy incorporate  dry ingredients until well mixed. If the mixture is too wet still add a tbs of flour at a time until it doesn't stick to your hand.
Mix the 3 Tbs of sugar and cinnamon in a small bowl.
Roll the dough, by hand, then roll the balls in the cinnamon sugar. Flatten the balls on your greased cookie sheet. Bake until light brown, but still moist in the center about 12 minutes. Serve warm with a big glass of milk and enjoy! 
Thanks so much to Aarika for asking me to do this guest post!
_______________________________________________________________
Thank you so much Amanda- these look totally scrumptious! If you guys haven't already checked out her adorable blog, please mosey on over there and say hello! Happy weekend everyone!